Wednesday, July 8, 2009

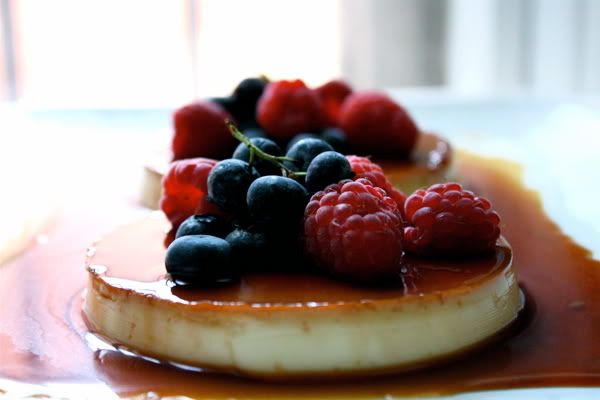
//Orange Crème Caramels with Berries

Photobucket

Ya know... I could have sworn I clicked the "Publish Post" button and not the "Save Now" button on Friday morning before I closed my laptop so I could head on out the door and onward to Seattle for the Fourth of July weekend. But, I guess I was wrong!

(Spoiler: Seattle is awesome. And very much a foodie town, like Portland. But that's not the focus of this post, though I do want to write a mini-wrap up post about the city some time this week.)

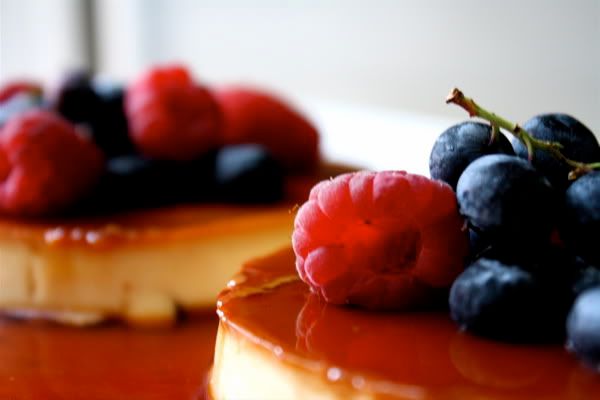
Crème caramel is often passed over in favor of the more popular crème brûlée. Both depend on caramel for their predominate flavor, but in a crème caramel, the caramel is soft and the custard is unmolded. Berries are the perfect accompaniment for the dish, as they blend well with the subtle hints of orange, and they complement the slight bitterness of the dark caramel. I chose a crème caramel recipe as my final dish for the Bounty of Blissful Berry Bites because I really want to buy a crème brûlée torch some time in the next few weeks — so that I can make brûlées (regular, fig, pumpkin... the entire panoply of custard recipes known to humankind), as well as sear meat and seafood. Also, typing "crème brûlée" with all the accents is just plain fun (editor's note: I have a weird sense of what constitutes "fun"). But, I couldn't in good conscience go through with the purchase until I first made an easier custard... one that didn't involve obtaining a fire extinguisher beforehand (just in case).

Orange Crème Caramels with Berries
Dish No. 6 of 6 for The Bounty of Blissful Berry Bites
(recipe borrowed from Classic Stars Desserts by Emily Luchetti)

For Orange Custard Base:
2/3 cup milk
2 cups heavy whipping cream
Peel of 1 orange
4 large egg yolks
1 large whole egg
2/3 cup granulated sugar
Pinch of kosher salt

In a heavy saucepan, combine the milk, cream, and orange peel over medium heat and cook until small bubbles appear around the edges of the pan. Remove from the heat, cover, and let steep for 10 minutes.

Meanwhile, prepare and ice bath. In a large stainless-steel bowl, whisk together egg yolks, whole egg, sugar, and salt until blended.

While whisking constantly, pour the milk mixture into the egg mixture in a slow, steady stream. Place the bowl in the ice bath and let cool to room temperature, whisking occasionally. Strain through a fine-mesh sieve into a bowl and discard the orange peel.
Photobucket

For Caramel:
2/3 cup sugar
5 Tbsp water

While the custard base is cooling, arrange six 5-ounce ramekins in a 9-by-3-inch baking dish. In a small, heavy saucepan, stir together the sugar and 3 Tbsp of water. Place over medium heat and cook, stirring occasionally, until the sugar dissolves and comes to a boil. Increase the heat to high and cook, without stirring, until the mixture becomes golden amber. Remove from the heat and let the bubbles subside for a few seconds. Stir in the remaining 2 Tbsp of water. Be careful as you stir, as the caramel with bubble up when you add the water.

Pour the caramel into the bottoms of the ramekins. If necessary, pick up each ramekin and rotate it so that the caramel completely coats the bottom. Set aside until the caramel hardens, about 10 minutes. Meanwhile, preheat the oven to 300° F.

Fill the caramel-lined ramekins with the custard base. Cover the pan with aluminum foil, but leave one corner open. Place the baking pan in the middle of the oven. Carefully pour hot water into the pan so that the water comes halfway up the sides of the ramekins. Cover the pan completely with foil.

Bake the custards for 50-55 minutes. To check if the custards are ready, carefully remove the foil and gently shake the ramekin. The custard should be set around the edges, yet have an area in the middle — about the size of a quarter — that is not completely firm. Remove the pan from the oven. Remove the ramekins from the pan with tongs or a dish towel to protect your fingers Cover an refrigerate for at least 2 hours before serving.

Photobucket

For Tops:
1 pint mixed berries
1 Tbsp Grand Marnier (optional)

Carefully run a knife around the inside of the edge of each ramekin and unmold the custards onto plates. In a bowl, toss the berries with the Grand Mariner, if desired.

Photobucket

Wednesday, July 1, 2009

//Puddin' Out Muffins

Photobucket

Happy Muffin Day!

Triple Berry Bread Pudding Muffins
Dish No. 5 of 6 for The Bounty of Blissful Berry Bites

For batter
7 cups of cubed bread (French, brioche, challah, or your choice)
Strawberry reduction (recipe to follow)
1/2 cup milk
4 eggs, lightly beaten
6 Tbsp butter, melted and cooled
1 pint blackberries
1/2 pint blueberries
1/2 lb strawberries
1 cup whole wheat pastry flour
1/2 tsp baking powder
1/4 tsp salt
1 tsp cinnamon

Preheat oven to 350° F. Place rack in the middle of the oven. Butter and flour one 12 muffin tin, or one 6 muffin tin.

Place the bread cubes in a large mixing bowl and add the strawberry reduction. Let stand for five minutes. Then stir in the milk, beaten eggs, vanilla, butter and berries.

In a separate bowl, combine the flour, baking powder, salt, and cinnamon. Stir this mixture into the bread cube mixture.

Evenly divide the mixture among the muffins cups, using two spoons. Place the muffin tin on a parchment lined baking sheet and place in the oven. Bake for about 25 to 30 minutes, or until golden brown and a toothpick inserted in the center comes out clean. Place on a wire rack to cool. Can dust with powdered sugar before serving.

Photobucket

For strawberry reduction
10 medium-sized strawberries
2/3 cup sugar
1 tsp fresh lemon juice
1 cup cream

In a medium-sized saucepan over medium heat, heat the strawberries, sugar, and lemon juice until the fruit breaks down and releases its juices (about 10 minutes). Remove mixture from heat and strain. Pour the cream into the reduction, and whisk until just combined.

Photobucket

Tuesday, June 30, 2009

//Deliciously simple, simply delicious

Photobucket

Sometimes the most flavorful desserts require minimal ingredients, preparation, and time to make. This exquisite lavender goat cheesecake comes to mind. It's an incredibly versatile recipe, as well: you can serve it as a dessert "nightcap" following a summer evening meal; or you can omit the eggs and use the batter and berries as filling for crepes or for pancakes. You can even use the lavender syrup in lieu of table syrup for waffles.

Lavender Goat Cheesecake with Fresh Berries
Dish No. 4 of 6 for The Bounty of Blissful Berry Bites

For cake
11 oz fresh goat cheese, room temperature
3/4 cup sugar
1 tsp vanilla extract
1 tsp fresh lemon juice
Zest of one lemon
6 large eggs, separated
3 Tbsp all-purpose flour
1/2 pint blackberries
1/2 pint blueberries
1 pint raspberries

Preheat the oven to 350° F. Butter a 9-inch cake pan and dust it with granulated sugar; tap out the excess.

Put the goat cheese, sugar, vanilla, lemon juice and zest in a stand mixer fitted with a paddle attachment and beat until smooth. Stir in the egg yolks, two at a time, mixing well after each addition. Add the flour and mix until incorporated.

In a separate mixer bowl, place the egg whites and whip on medium speed until a soft peak forms. Using a spatula, gently fold in the whipped whites into the goat cheese batter. Spread the batter into the prepared cake pan.

Bake until toothpick inserted into the center comes out clean, about 25 to 30 minutes. Let cool to room temperature, then top with berries.

Photobucket

For lavender syrup
1/2 cup sugar
1/3 cup loosely packed lavender
1 tsp lemon juice
1/4 cup water

In a medium-sized saucepan, add the sugar, lavender, lemon juice and water. Once the syrup comes to a boil, remove it from heat and strain it. Cover the syrup and allow it to steep for at least 20 minutes.

Using a dry pastry brush, spread the syrup over the cake and the berries. Optional: sprinkle dry lavender onto the cake.

Photobucket

Monday, June 29, 2009

//Good to the last drip: Blueberry Pecan Sticky Buns

Photobucket

There's a note at the bottom of the recipe page that says "Sticky buns are best eaten the day they are baked." Well, OK. You're twisting my arm here, Martha Stewart, but I suppose I can bring myself to follow this direction. But only because last week I had the unfortunate luck of buying a sticky bun that turned out to be as chewy as taffy and as dry as cardboard. It came from a reputable nearby bakery, too! I was mighty surprised at the bun's supbar quality, and vowed to make a better batch for this week's berry fest.

Blueberry Pecan Sticky Buns
Dish No. 3 of 6 for The Bounty of Blissful Berry Bites
(adapted from Martha Stewart's Baking Handbook)

For Dough

Photobucket

1 cup warm milk (110° F)
2 envelopes active dry yeast
4 1/2 cups all-purpose flour, plus more for dusting
1/3 cup plus 1 Tbsp sugar
1 Tbsp coarse salt
1/2 tsp ground cardamom
4 sticks unsalted butter, room temperature, cut into tablespoons
2 large whole eggs, plus 1 large egg yolk

In a small bowl, sprinkle the yeast over the warm milk; stir until dissolved. Let sit until foamy, about 5 minutes. In the bowl of an electric mixer fitted with a dough hook, combine the flour, sugar, salt, cardamom, and 4 Tbsp butter; beat on low speed until butter is incorporated and the mixture resembles coarse meal, 3 to 4 minutes. Pour in the yeast-milk mixture; mix until dough just comes together. Add the eggs and yolk; mix until just combined, 2 to 3 minutes. Do not overmix.

Turn the dough out onto a lightly floured work surface, making sure to include any loose bits left at the bottom of the bowl. Gently knead to form a smooth ball, about 30 seconds. Wrap well with plastic, and refrigerate at least 2 hours or overnight.

On a lightly floured work surface, roll out dough to an 18-by-10-inch rectangle, about 1/4 inch thick, keeping the corners as square as possible. Remove any excess flour with a dry pastry brush. With a short side facing you, evenly distribute the remaining butter over two-thirds of the dough. Fold the unbuttered third over as you would a business letter, followed by the remaining third. This seals in the butter.

Roll out the dough again to an 18-by-10 inch rectangle, then fold dough into thirds as described above; refrigerate for 1 hour. Repeat this process 2 more times.

Refrigerate dough, tightly wrapped in plastic for at least 4 hours to overnight.


For Buns

Photobucket

3 1/3 cups pecan halves
2 1/4 cups light corn syrup
3/4 cup plus 2/3 cup packed dark-brown sugar
All-purpose flour, for dusting
3/4 cup sour cream
1 Tbsp ground cinnamon
1 cup fresh, whole blueberries

Let dough stand at room temperature until slightly softened, about 15 minutes. Line a large baking sheet with parchment paper; set aside. Generously butter two 6-cup jumbo muffin tins. Chop 2 cups pecans, and break the remaining 1 1/3 cups in half lengthwise, keeping the two groups separate. Pour 3 Tbsp corn syrup into each muffin cup, and sprinkle with 1 Tbsp brown sugar. Divide halved pecans among the muffin cups.

Photobucket

On a lightly floured work surface, roll out the dough to an 18-by-14 inch rectangle, about 1/4 in thick. Using a spatula (offset, or regular), spread the sour cream over the surface of the dough, leaving a 1/2 inch border. Dust the sour cream with cinnamon, and sprinkle with chopped pecans, remaining 2/3 cup brown sugar, and the blueberries. Roll up the dough tightly lengthwise to form a log about 3 inches in diameter, and trim the ends using a serrated knife. Transfer log to prepared baking sheet. Refrigerate until firm, about 30 minutes. Meanwhile, preheat the over to 350° F.

Photobucket

Using a sharp knife and a sawing motion slice the dough crosswise into 12 rounds, about 1 1/2 inch thick, and place in prepared pans. Cover loosely with plastic wrap, and let rise in a warm place until 1/2 inch above cups, about 20 to 30 minutes. Transfer to the oven, placing a baking sheet on the rack below to catch drips. Bake, rotating pans halfway through, until buns are dark golden brown, about 40 minutes.

Photobucket

Immediately turn out the buns onto parchment-lined baking sheets. Replace any pecan halves that have fallen off. Place the baking sheet on a wire rack to cool. Serve warm or at room temperature. "Sticky buns are best eaten the day they are baked."

Photobucket
Photobucket

//Raspberry-Peach Cobbler with Earl Grey Biscuit Topping

PhotobucketPhotobucket


Raspberry Peach Cobbler with Earl Grey Biscuit Topping
Dish No. 2 of 6 for The Bounty of Blissful Berry Bites
(an adaptation of a cobbler recipe found in Martha Stewart's Baking Handbook)

For Cobbler
2 pints fresh raspberries
1 1/2 lbs yellow peaches, pitted and diced
1 1/4 cups sugar
1/3 cup instant tapioca
Juice and zest of 1/2 lemon
1/2 tsp plus a pinch of salt

For Drop Biscuits
1 1/2 cups all-purpose flour
3/4 cup fine yellow cornmeal
2 tsp baking powder
1/2 tsp baking soda
1 tsp salt
2 Tbsp sugar
2 bags of Earl Grey tea
1 stick unsalted butter, cold, cut into small pieces
1 cup milk

Photobucket

Preheat oven to 375° F, with racks in the center and lower third. Lined a rimmed baking sheet with parchment paper; set aside. In a large bowl, toss together the raspberries, peaches, sugar, tapioca, lemon juice, and pinch of salt; stir to combine. Let stand about 15 minutes, stirring once or twice. Divide the filling among six to 8 10-ounce baking dishes, or pour into a 2 1/2-quart baking dish.

Photobucket

In a large bowl, whisk together the flour, cornmeal, baking powder, baking soda, salt, sugar, and Earl Grey tea. Using a pastry blender, cut in the butter until the mixture resembles coarse crumbs with a few larger clumps remaining.

Photobucket

Pour in the milk; using a rubber spatula, fold milk into the dough, working in all directions and incorporating crumbs at the bottom of the bowl, until the dough just comes together. Do not overmix. Using a large spoon, top cobbler filling with dollops of dough, leaving a 1-inch border.

Photobucket

Brush dough with cream. Transfer baking dishes to prepared baking sheet; bake, rotating sheet halfway through, until biscuits are golden brown and juices are bubbling, 50-60 minutes. Cool on a wire rack, at least 1 hour. Serve warm or at room temperature.

Photobucket

Sunday, June 28, 2009

//Dinner by Candlelight: Halibut cheeks over chard with a cherry-balsamic reduction

Photobucket

Usually, often, most of the time, I have enough self-control pulsing through my body that I will first photograph what I've made, and then, only after I'm sufficiently satisfied with the pictures, will I dig in.

Tonight was not that night.

It was the cherry-chocolate balsamic reduction (ladled over sauteed halibut cheeks and roasted chard, of course) that prompted me to pick up my knife and fork mere seconds after I had set the plates down on the dining room table. The curiosity of wanting to know what the sauce tasted like overwhelmed me to the point where photographing the meal didn't even enter my mind. It was only after I had used the remaining chard leaves to sop up some of the sauce, and then used my index finger to wipe the plate clean of cherry pieces and halibut flesh, that I even glanced in the direction of my Canon camera.

I can't say I was all that upset.

Cheeks-Chard-Cherries
Dish No. 1 of 6 for "The Bounty of Blissful Berry Bites"

For Chard:
1 bunch of rainbow chard, stalks trimmed and cleaned.
1/4 cup olive oil
Salt and pepper to taste

Preheat the oven to 300° F. In a shallow baking dish, mix together the rainbow chard, olive oil, salt, and pepper. Just before placing the dish in the oven, cut the temperature down to 250° F. Roast the chard until the leaves just begin to wilt. Be careful not to brown the pretty stems too much! Pull the dish from the oven and dress the leaves and stems on plates.

For Halibut cheeks:
2 six oz halibut cheek portions
Flour and butter for dredging
2 Tbsp extra virgin olive oil
Salt and pepper to taste

Remove the halibut cheeks from the butcher paper, butter them, and dredge them in flour. Heat the 2 Tbsp of oil in a large saute pan over medium heat. When the oil spreads enough to coat the base of the pan, add the halibut to it. Wait 6 minutes before flipping it. Wait another 6 minutes, and then plate the fish on top of the rainbow chard immediately.

For Cherry-Chocolate Balsamic Reduction:
2 Tbsp butter
1/4 cup (scant) flour
1/2 cup balsamic vinegar
15 ripe red cherries, pitted
2 Tbsp dark brown sugar
1 Tbsp dark chocolate chunks
1/3 cup olive oil
Zest of half an orange

Melt the butter in a medium-sized saucepan over medium heat. When it begins to brown, add the flour and stir until all the liquid is absorbed. Add the balsamic vinegar, pitted cherries, brown sugar, chocolate chunks and olive oil. Stir until well-combined; then reduce the heat to a low simmer. If necessary, thin the sauce with a little extra vinegar. Before spooning it over the halibut, grate the orange zest into the pan.

//The Bounty of Blissful Berry Bites

Who's got fresh picked berries and cherries in her refrigerator? ME.

Late this Spring, my mom introduced me to the idea of going to "pick-your-own farms" to get fresh berries. She went berry picking with her friend Judy, and together they brought back 6 pounds of ripe 'n' ready blueberries. 6 pounds! Then, during my last flight to Portland, I sat next to a computer programmer who was particularly knowledgeable about the pick-your-own farm scene. He also told me about Sauvie Island Farms, and said they had some of the best pick-your-own produce in the Portland area.

These 2 separate events caused me to go "Hmmm. Maybe there's something to this pick-your-own berry thing." I floated the idea of going berry picking to Mr. Professional Nerd, because I thought it'd be a fun date to go on, and also because there isn't any form of reliable public transportation that goes out to the island. He agreed to drive me to the farm, and even offered to help me pick berries... so long as I paid him in berry-themed food. I agreed to the terms of the deal.

Mr. Professional Nerd and I, we're a Super Awesome Berry Picking team! 2 hours = yielded several pounds of berries. I'm a pick-your-own convert now. The fields are just 20 minutes from home, the berries are a piddly $1.75/lb, and they are vastly superior — taste, texture, size — to anything you'd find at the grocery store. The raspberries are especially delicious, and HUGE (roundest section of the berries are about the width of a nickle!). I'm a very happy lady right now.

In keeping my promise to Mr. Professional Nerd, I'm going spend the entire week making meals and desserts that have berries and cherries in them. I've decided to call this cooking fest "The Bounty of Blissful Berry Bites." Check the blog each day for new updates.

Gotta run back to the kitchen!

Photobucket

Photobucket

Photobucket

Photobucket

Photobucket

Photobucket

Photobucket

Wednesday, June 24, 2009

//Happy Muffin Day!

Photobucket

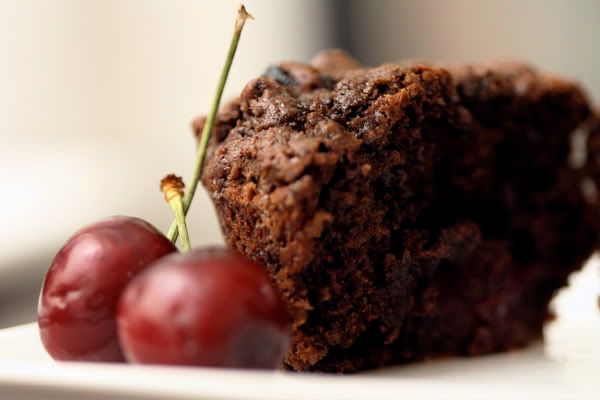
To celebrate the arrival of the Oregon's cherry and blueberry season, I made...

Cherry-Berry-Choco-Walnut Muffins

1/2 cup unsalted butter, melted and cooled
2 large eggs
1 cup buttermilk
2 tsps pure vanilla extract
1 3/4 cups all-purpose flour
2/3 cup unsweetened cocoa powder
1 1/4 cups light brown sugar
1 tsp baking powder
1 tsp baking soda
1/2 tsp salt
1 cup semisweet chocolate chips
1 cup candied walnuts (your own, or store-bought — this is the recipe I used)
3/4 cup dried blueberries
3/4 cup pitted red cherries

Photobucket

Before you begin, you're going to want to pit the cherries and soak the dried blueberries in hot water. The water will cause the blueberries to plump during the baking process. Preheat oven to 375°. Position rack in center of oven. Butter and flour dust 1 standard size muffin tin.

In a large measuring cup or bowl whisk together the cooled butter, eggs, buttermilk, and vanilla extract.

In another large bowl whisk together the flour, cocoa powder, sugar, baking powder, baking soda, and salt. Stir in the chocolate chips. With a rubber spatula fold the wet ingredients, along with the cherries, blueberries and candied walnuts, into the dry ingredients and stir only until the ingredients are combined. Again, apply the 15 strokes method when mixing.

Evenly fill the muffin cups with the batter (the muffin cups will be full). Place in the oven and bake until a toothpick inserted in the center of a muffin comes out clean, about 20 minutes. Transfer to a wire rack and let cool for about 5 minutes before removing from pan.

Photobucket

Monday, June 22, 2009

//Labor of Love: Recreating the Pretzel Croissant

Photobucket

Once upon a time there was a bakery in the Brentwood/Santa Monica area called The City Bakery. And this bakery once sold pieces of happiness in the form Pretzel Croissants for $3.75 a pop. Now, these croissants... they were these amazing multi-layered, butter-bursting, sesame-dusted, salty, crispy-caramel-colored puffs of utter ecstasy. People came from far and wide to get these croissants fresh off the cooling racks each morning and throughout the afternoon. I was one of those individuals, and did I travel far to get them.

These croissants were better than any of the ones I had in Paris two years ago, so much so that during my first trip to the bakery, I went back inside and got myself another one. I remember it being really hard not to eat the second croissant right then and there: I finally had to break down and eat some Reese's peanut butter Easter eggs to take my mind off of it. (I lead a difficult life, I'm aware.) The best part about the experience was the fact that if I gave the pastry the slightest pinch, melted butter seeped out from the layers. That's right, the croissant oozed butter! So it wasn't the most heart-healthy thing to eat. But it was a croissant! IT WASN'T MEANT TO BE. Oh, it was so good. So very, very good.

And then one Saturday, City Bakery went bye-bye. Shuttered. No more. It didn't bother me all much because I'd already made up my mind to move away from Los Angeles, but I imagine it left a void in the hearts of each one of the bakery's fervent devotees. A void once filled with the arterial plaque that developed from having ingested too much butter, but a void nonetheless.

There still exists a City Bakery in New York City, and they still serve Pretzel Croissants, and I'm sure they'll gladly UPS you however many croissants $20 gets you. But there might come a time when you wake up and want a Pretzel Croissant before the day is over, and you happen to live on the other side of the country. Should that ever happen to you, I've got just the recipe for you.

Photobucket

Pretzel Croissant
(an adaptation of Martha Stewart's croissant recipe, found in Martha Stewart's Baking Handbook)

2 cups cold milk
2 tbsp honey
1 1/2 lbs (about 4 1/2 cups) bread flour, plus more for dusting
4 oz (scant 1 cup) pastry flour (if you don't have pastry flour, mix equal halves of all-purpose and cake flour)
1/2 cup sugar
1 1/2 oz fresh yeast, crumbled
1 tbsp plus 1 1/2 tsp kosher salt
1 3/4 lbs (5 sticks) unsalted butter, cold
1 large egg, lightly beaten
Enough kosher salt and white sesame seeds to sprinkle over the dough before you place it in the oven

Helps to have:

A pastry scraper
A pizza roller
A ruler
Baking sheets with edges to prevent melted butter from running off while the croissants are baking

Photobucket

For the dough:

Pour the milk and honey into a 1-quart liquid measure cup, and stir to combine. In the bowl of an electric mixer fitted with a dough hook, stir together 1 lb 6 oz (about 4 1/14 cups) bread flour, pastry flour, sugar, yeast and salt; stir to combine. Add the milk mixture, and mix on low speed until the dough just comes together, about 2-3 minutes.

(Chef's note: Keep in mind that salt kills yeast, so I always add the salt to the bottom of the mixer, and put the yeast on top of the flour. It's also really important that you have a dough hook because other attachments won't mix the ingredients as thoroughly.)

Turn out dough onto a lightly floured work surface; gently knead to form a smooth ball, about 45 seconds. Wrap in plastic and refrigerate for at least 1 hour.

For the butter package:

Lay the butter sticks side by side on a piece of plastic wrap, and sprinkle with the remaining 2 oz of bread flour. Pound with a rolling pin until flour is incorporated, and roll into an 8-inch-square. Wrap tightly and refrigerate for 1 hour.

Remove dough package from the refrigerator; place on a lightly floured surface. Roll out to a 16-by-10 inch rectangle, about 1/2 inch thick, with a short side facing you; keep the corners as square as possible. Remove any excess flour with a dry pastry brush. Remove butter package from refrigerator, and place it on top of the dough package. Starting at the far end, fold the top half of the rectangle over the butter package; repeat with the bottom half, there will be some overlapping. Flip the dough over, so the seams are face down. Proceed to roll the dough so that the butter integrates itself into the dough package. You will want to roll it out again to a 16 x 10 inch rectangle. Then fold the dough in third like a letter.

This completes the first of 3 turns. Wrap in plastic and refrigerate 1 hour.

Photobucket

Repeat rolling and folding as above 2 more times, starting with the flap opening on the right, as if it were a book, and refrigerate at least 1 hour between turns. After the third and final roll, refrigerate one more time, 6 to 8 hours, to overnight.

Later than day/the following morning, turn out chilled dough onto a lightly floured work surface. Roll out the dough to a 30-by-16 inch rectangle. Using a pizza wheel or pastry cutter, cut the dough in half lengthwise to form two 30-by-8-inch rectangles. Stack one piece of dough on top of the other, lining up edges. Using the pizza wheel, cut dough into triangles, each with a 4-inch base. Cut a 1-inch slit in the center of the base of each triangle. Place triangles in a single layer on a clean work surface.

To shape the croissants, stretch the two lower points of each triangle to enlarge the slit slightly. Fold the inner corners formed by the slit toward the outer sides of the triangle, and press down to seal. Using your fingertips, roll the base of the triangle up and away from you, stretching the dough slightly outward as you roll, the trip should be tucked under the croissant. Put the two ends toward you to form a crescent. Transfer crescents to two parchment-lined baking sheets, 2 inches apart. Cover loosely with plastic wrap, and let rise in a warm spot until very spongy and doubled in bulk, about 45-60 minutes.

Preheat the oven to 400°, with the racks in the upper and lower thirds. Lightly brush crescents with beaten egg and sprinkle with kosher salt and sesame seeds. Bake, rotating sheets halfway through, until the croissants are puffed and golden brown, about 20 to 25 minutes. Transfer sheets to a wire rack to cool. Serve warm or at room temperature.

Photobucket
The Chef, with the aforementioned Pretzel Croissant, the day before City Bakery closed in April 2009.

//Definitely Phobulous

Photobucket

Traditional Vietnamese Pho
(recipe courtesy of FoodNetwork, with some modifications)
(originally served with Summer Solstice Rice Pudding)

For the broth:

4 lbs beef neck bones or Oxtails (if the latter, cut into 1 1/2 to 2-inch pieces and trimmed of fat)
3-inch piece of ginger, unpeeled
1 large onion, halved and unpeeled
1/3 cup fish sauce
8 whole star anise
5 whole cloves
3-inch cinnamon stick
1 tsp fennel seeds
3 bay leaves

For the garnish:

1 lb 1/4-inch rice noodles
2 bunches scallions, sliced thin
1/2 cup tightly packed fresh cilantro leaves, roughly chopped
1/2 cup parsley, roughly chopped
1/2 cup basil, approximately, whole fresh plants (minus roots) if possible
1 1/2 cups mung bean sprouts
3 large limes, cut into wedges and seeds removed
Red chile paste or sliced fresh hot chilies (optional)
3/4 lbs beef round steak, paper-thin

Put the neck or oxtails (or both!) into a large stockpot and add 2 gallons of water until the meat is completely submerged. Bring to a full boil and then lower the heat to a rapid simmer. Skim the scum that rises to the surface. (Chef's note: I chose to do a "fake-out boil" where I boiled the meat until the scum rose to the surface, drained the pot, and reintroduced fresh water. This method ensures that final broth is fairly scum-free.)

After you've returned the water to a boil, place the ginger and onion halves on a baking sheet and char them under the broiler until lightly blackened, 10 to 15 minutes. Turn them over halfway through cooking. When cool enough to handle, rinse the onion and ginger under running water, using a knife to scrape away some of the charred surface. Cut the ginger into 3 pieces and toss it and the onion halves into the simmering broth, along with 1 tablespoon salt and the fish sauce.

Photobucket

Put the star anise, cloves, and cinnamon stick in a small skillet and toast them on top of a stove burner over medium heat. Turn the spices a couple of times until they're slightly darkened (3 to 4 minutes) and until you smell their aroma. Put the toasted spices and fennel seeds in a small square of double thick cheesecloth and tie the bundle with a long piece of kitchen twine. Add the spice bundle and the bay leaves to the broth, tying the end of the twine to the pot handle for easy retrieval.

Let the broth simmer, uncovered, skimming occasionally. After 4 hours, remove the spice bundle, onion, bay leaves and ginger from the pot and discard. Remove the oxtails from the pot and set aside. Let the broth continue to simmer. When the meat is cool enough to handle, pull the meat from the bones. Set the meat aside and return the bones to the broth. Continue simmering, uncovered, until the broth is rich and flavorful, about 1 hour. Taste the broth and add more salt or fish sauce as needed.

Photobucket

Soak the rice noodles in cold water for at least 20 minutes. Arrange the sliced scallions, cilantro, parsley, basil, bean sprouts, lime wedges, and chiles on a platter in separate piles.

Bring a large pot of water to a boil and add the drained rice noodles. Give the noodles a quick stir and cook until tender but firm, about 1 minute. Rice noodles can quickly become gummy, so don't let them overcook. Drain the noodles. Warm 6 large bowls by rinsing them with hot water and divide the noodles among the bowls.


Photobucket

Just before serving, return the broth to a full boil. Arrange the slices of raw beef and pieces of cooked oxtail meat over the noodles in each bowl. Carefully ladle the boiling broth over all; the raw beef should be submerged in the broth. Serve immediately, along with the platters of garnish.

Photobucket

Sunday, June 21, 2009

//Dessert First

Photobucket

Last Thursday my friends Wendy and Sasha took me to one of Portland's premier Asian food markets, "Fubonn," on NE 82nd Street. It's located in the heart of a mini-mall, surrounded by Asian bakeries and specialty stores. The mall itself reminded me of the Korean marketplace on Western Boulevard in Los Angeles, and the supermarket made me nostalgic for the Chinese grocery store chain 99 Ranch Market in Los Angeles county. The invitation to join my friends this excursion worked for me, as images of fried whole rock cod stuffed with ginger, bibimap and miles of rice noodles, along with other Asian delights, had been coming to me whenever I was running on the treadmill at the gym.

The overall cheapness of everything at Fubonn necessitated some self-restraint to keep me from buying more food than I could reasonable consume (such as 99 cent frozen coconut sticky rice with black beans stuffed in a 12"-long bamboo husks). And then there was the impulse to buy fresh galangal and kaffir lime leaves. These are what make Thai curry Thai curry. But I wasn't going to be making Thai curry this Sunday — shortly after laying eyes on the paper-thin strips of round eye steak in the butcher case, I decided I was going to make Pho for the first time (from fresh stock).

And then there was dessert.

The order of operations for determining this past Sunday's dinner was a little unusual: I knew what dessert I wanted to serve my guests before I settled on a main course. Serving forbidden rice pudding was one of the images that had come to when I went to the gym last Monday. When I went to Fubonn with Wendy and Sasha, I went there with the intention of acquiring the ingredients for the dessert first, and then worked backward from there to decide on the main course. Dinner's primary purpose was to ramp up to the final course. Pho fit the bill, as its aroma, taste and texture isn't particularly overwhelming — like tom yum goong can be; nor is it nearly as rich as any of the South Asian curries that spring to mind. It's simple and delicate, and wouldn't steal the spotlight from dessert. All right; enough blathering on about dinner. Onto dessert!

Photobucket

Summer Solstice Rice Pudding

2 1/2 cup water
1 1/4 forbidden rice
1/2 cup sugar
1 tsp cardamom
1 can of coconut milk
1 mango, diced into chunks
1 medium Hawaiian papaya, diced into chunks
2 gold kiwis, sliced
Optional: 2 dragon fruit

Photobucket

Put water and rice into a medium pot, cover and bring to a boil. Reduce heat to low and simmer until all of the water is absorbed, about 45 minutes. Uncover and stir in all but a drizzle of coconut milk and sugar. Bring back to a simmer and cook, uncovered, for 15 minutes more.

Divide rice pudding among bowls, top with fruit, and drizzle some of the remaining coconut milk over it.

Photobucket

Did I mention that while at Fubonn I found whole, frozen dragon fruit from Vietnam? I DID! They're only sold fresh in Los Angeles at the Farmers' markets during the month of September — apparently up until November in Amsterdam, as I saw them for sale there when I visited last November — and afterward become incredibly difficult to find. But there they were, in the frozen fruit section of Fubonn. They were so pretty, I wasn't sure if I could bring myself to cut into their bright magenta flesh. But I did.

Photobucket

We often see mango and papaya paired with South Asian cuisine, so choosing the above tropical fruit was an obvious choice. But I also wanted colors that paired rather nicely with the smokey midnight purple of the pudding because yesterday (June 21st) was the longest day of the year. In Portland, the sun didn't finally go down below the horizon until well after 10! The Summer Solstice Rice Pudding was a perfect way to end the rather long day.

Photobucket